WeConvene Event Creation
User Story
As a sell side Corporate Access Manager, I want to be able to create investment events, where I can customise details such as event types, event distribution targets, event schedule detailed to the slot level, and etc.
Background knowledge/Analysis
An investment event consists of certain pieces of important information:
- Event Title
- Event Type
- Event Date
- Event Location
- Industry Ticker
- Event Summary
- Event Attendees
- Keywords
- Event Distribution Time and Target — when and who to send out event invitation
- Event Schedule
- Branding — Event image, etc
If we are to put each and every of the above into a single form, the page will be too lengthy for users to fill up/navigate among sections. Especially for the event schedule section, where there can be tens of hundreds of items/slots in a single event.
Also all these details will require different types of form elements/validation methods in order to let users fill up properly.
Solution
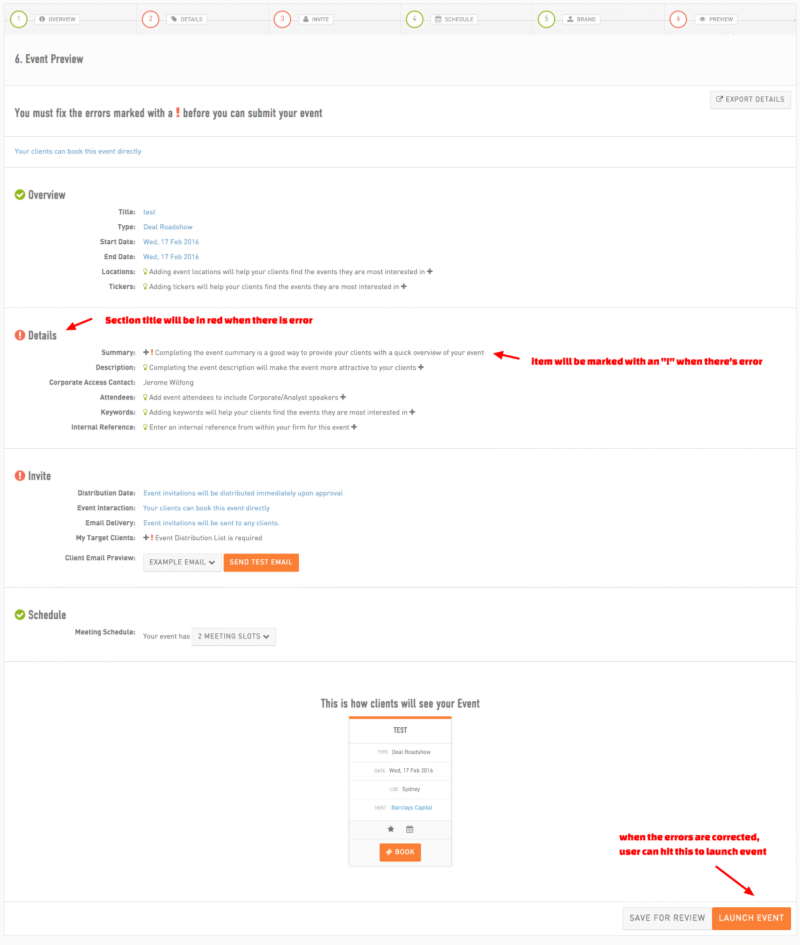
After many discussions with our business analysts, we’ve decided to divide the above details into five steps/section, which users can jump across when filling in, and there will always be a “next” button on each subpage for users to navigate. At the last step/subpage, users will be able to preview the details once again to makes sure they’ve typed in the correct information, and wrong information will be highlighted in red and become clickable; when clicked, users will be taken back to the corresponding section for correction.
Details are split into the following sections:
- Event Details: title, type, location, tickers
- Event Description: summary, detailed description, attendees, keywords
- Event Invitation: distribution time, distributed clients
- Event Schedule: Meetings, Itineraries
- Branding: images, logos
Mockups/Implementation
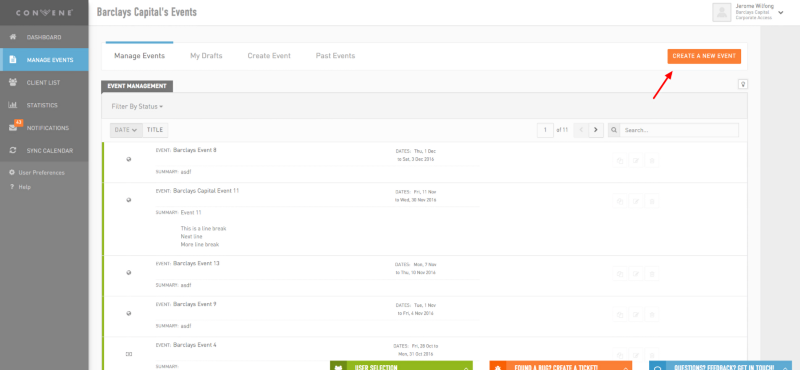
In Event Management page, click on “Create a New Event”
The initial event creation page
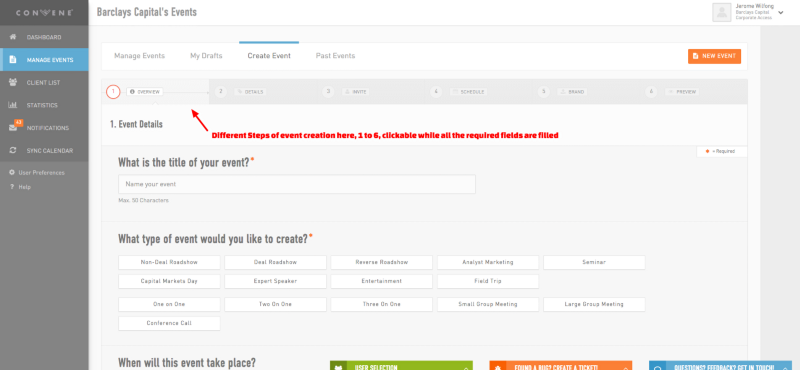
Input text field

Correct State

Validation and help text: deliberately left blank and proceed

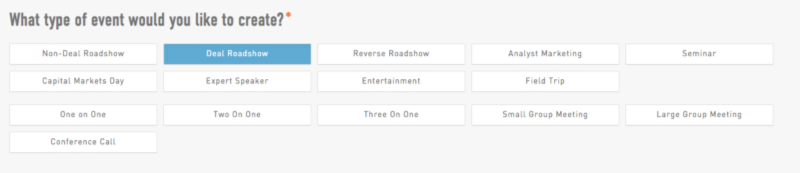
Event Type selection; The reason for showing all types upfront is that users will be able to choose quickly from all the revealed items, rather than choosing from a < select > element with multiple clicks/scrolling; also since the event creation process has been divided into parts, clarity is much preferred here than compactness.
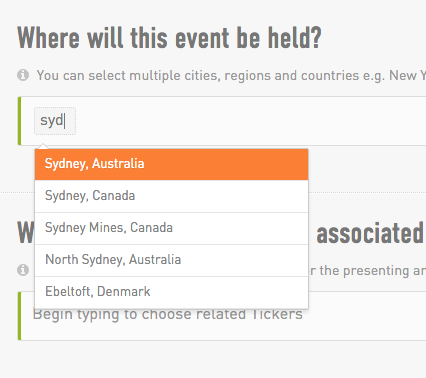
Event location: this is our customised autocomplete field widget, developed chiefly to replace the heavy reliance to < select > element. Here user can simply type in a few words to choose from a list of filtered results.

Type in “syd”, and “Sydney, Australia” will be filtered
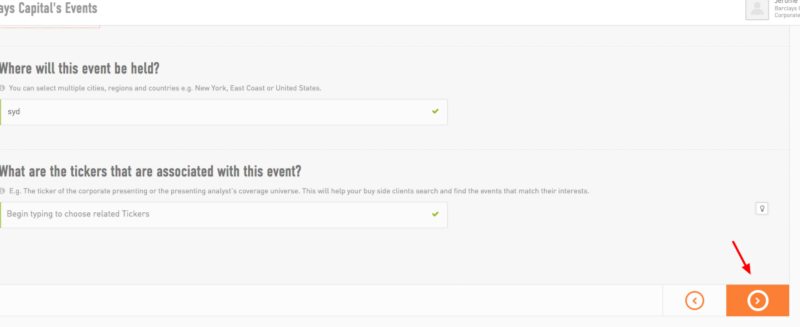
Hit the next button to proceed to the next step
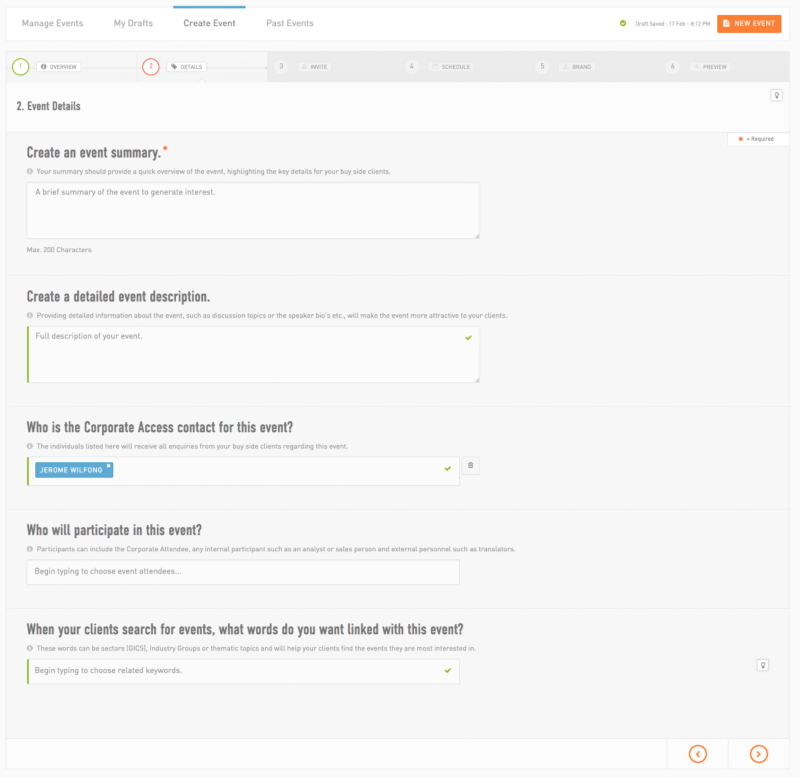
Second step: Event Description, let’s try to leave the summary part blank and see what happen in the end.
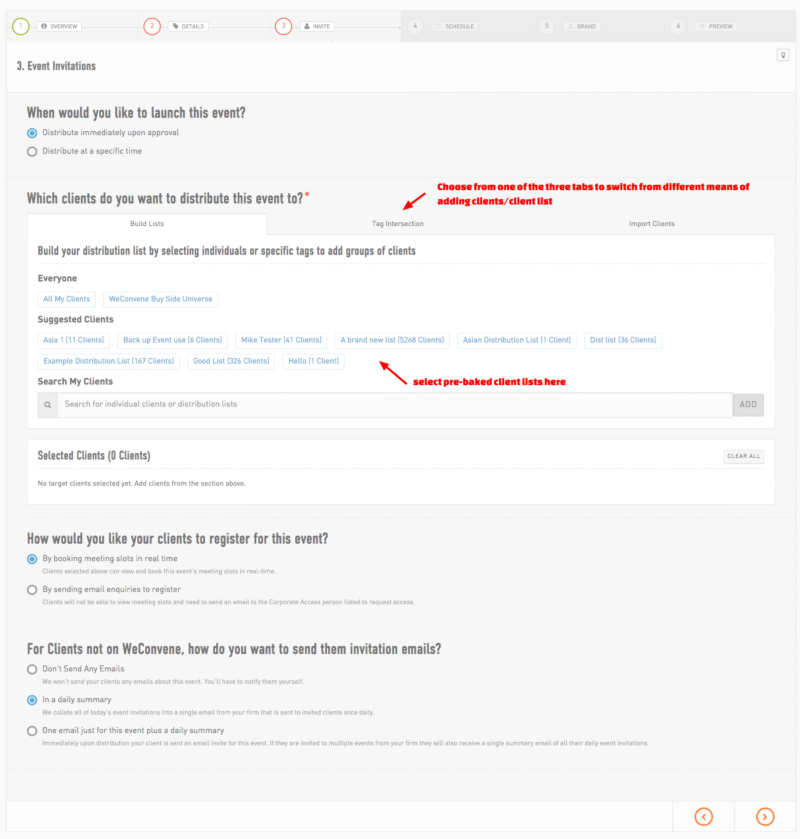
Third Step: Event Distribution, notice the red circle of the step, which means there are errors on that page.
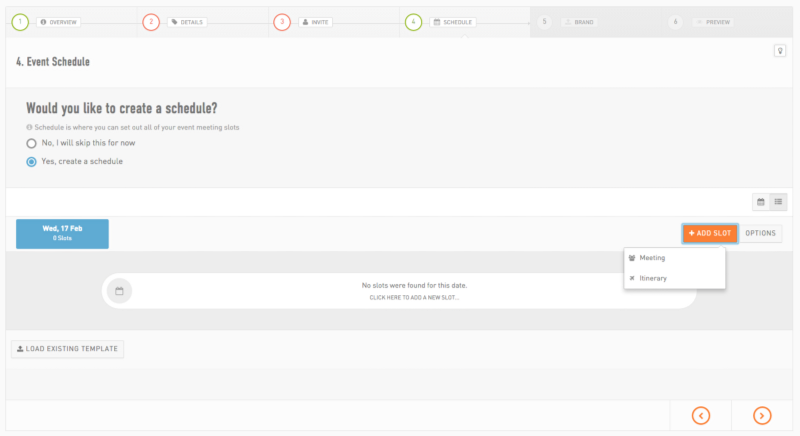
Fourth Step: Event Schedule, where meeting slots and itinerary slots can be created. Let’s hit “Meeting” to create a meeting slot.
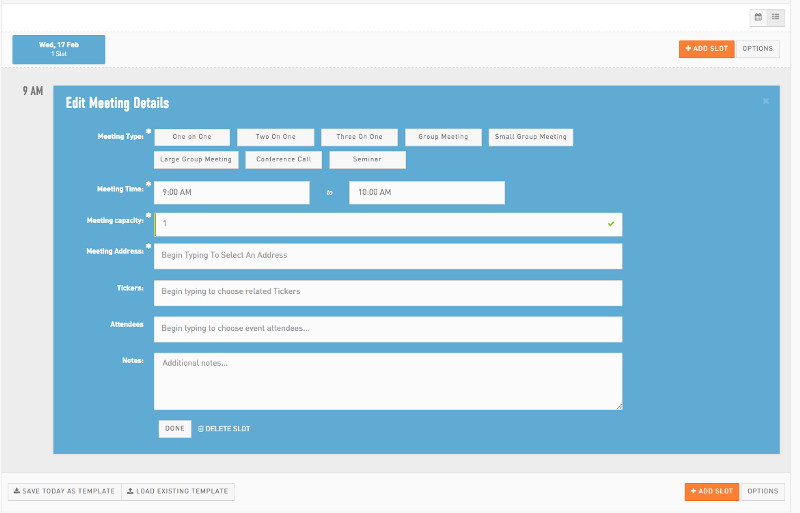
Slot creation panel for meeting slot
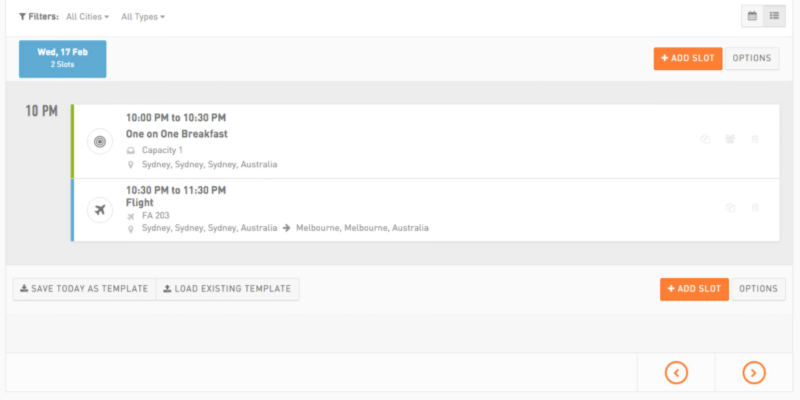
How meeting slot and itinerary slot are different from each other.
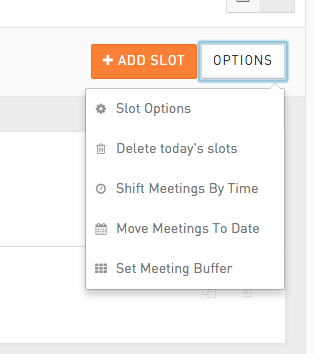
There are options/actions that can be applied to the schedule, when done, click next to proceed
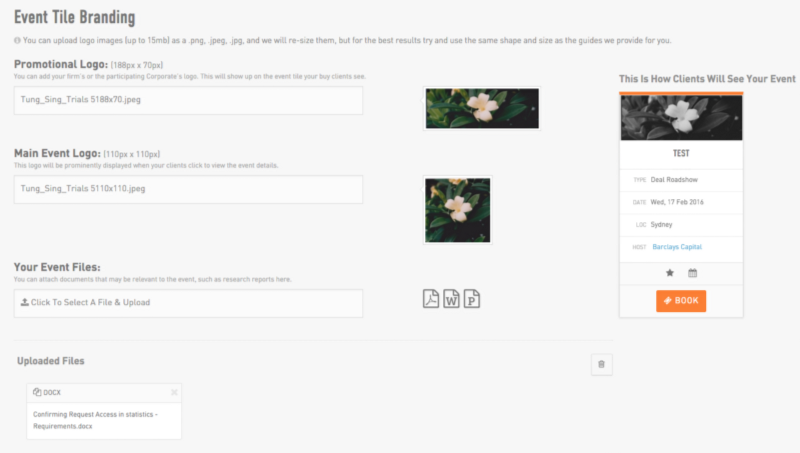
Fifth Step: Event Branding
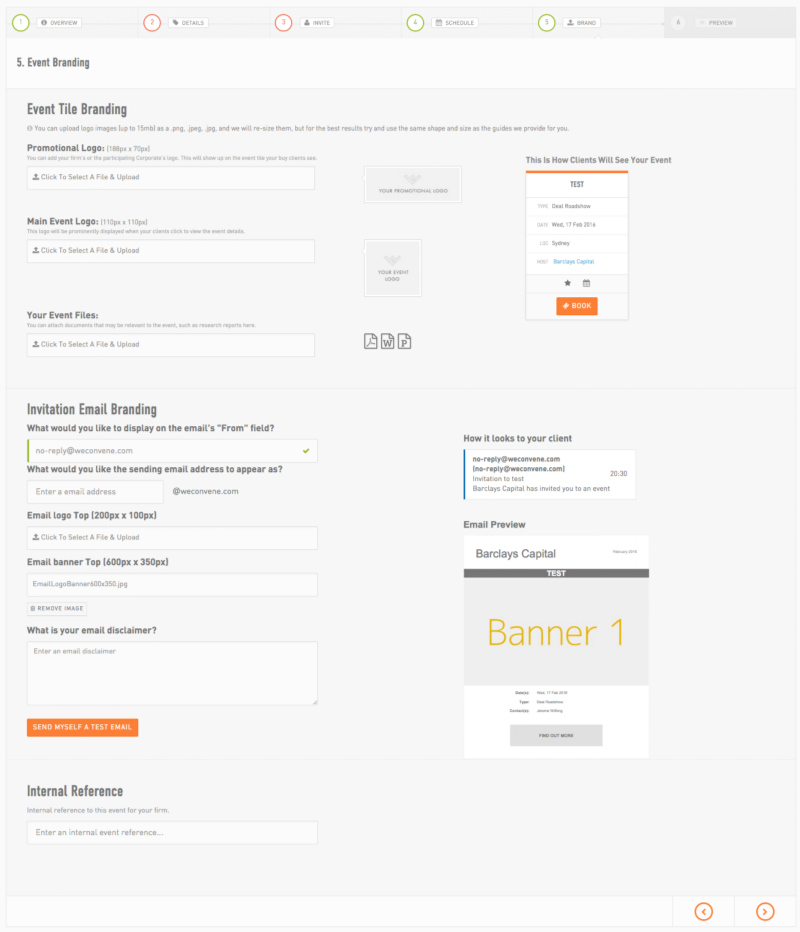
Fields being filled up
Final Preview page