WeConvene Distribution List
User Story
As a sell side Corporate Access Manager(CAM), I want to be able to view and search from my collection of clients on a page, and perform simple management/categorisation actions to them.
Background Information/Analysis
In a large sell side firm, a CAM will usually have a massive list of clients, managed in their Client Relationship Management System (CRM). The list is usually categorised/tagged according to the CAM’s own preference. Common cases are 1. clients will be divided into various Tiers (Tier 1, Tier 2, Tier 3, etc…); 2. some might be tagged according to their regions or locations (Asia, London, etc…). These lists are usually exportable from the CRM in the form of CSV.
In order to let CAMs painlessly integrate their user experience with our platform, we have this feature request of building a distribution list management page, which functions similarly to their CRM, so that clients can be added out right from the event creation process or from the client list page.
In brief, this feature should essentially take care of two objects: client and (distribution) tags.
Clients can be bulk uploaded to the system , they must be unique with their email addresses(required field), other optional details include first name, last name, and their distribution tags. A single client can have as many tags as possible. The page should also allow users to filter clients by tags, and perform simple bulk action: add tag, remove tag.
Solution
For simplicity, both server side and frontend guys agreed that tags should be flat for the time being — there shouldn’t be any hierarchal structure as users (CAM) only care about clients but not their tags, so say a client can have a tag called “UK” and another called “London”, and the two do not relate to each other.
The client upload process is also a complicated structure, we’ve therefore employed the step-by-step approach in event creation to help users create their client list without errors.
Upon finish of the add clients process, user will be able to see their uploaded clients in a simple list, where tags are also as visible as possible. Clients are multi-selectable across pages, and there should be a simple button to perform add/remove tags actions.
Mockups/Implementation
Client Uploads
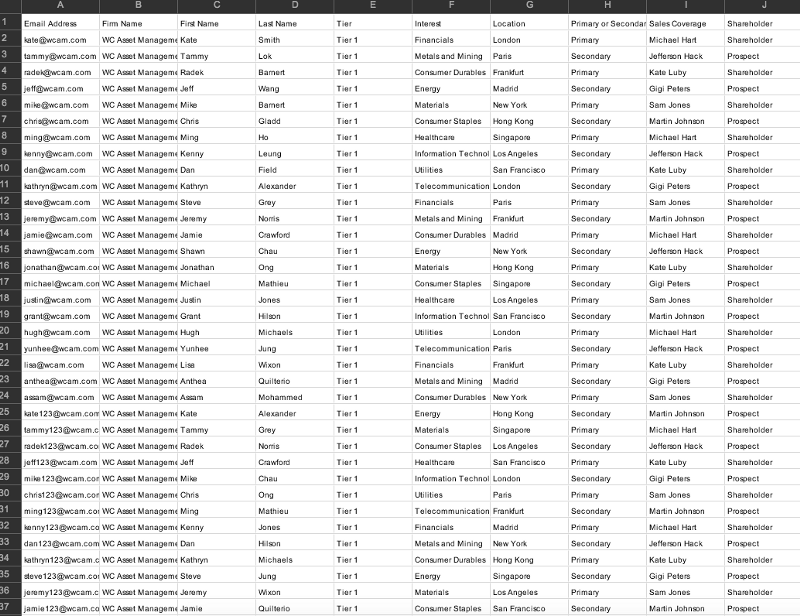
Now that we have a generic exported CSV from a CRM system, the structure looks like this
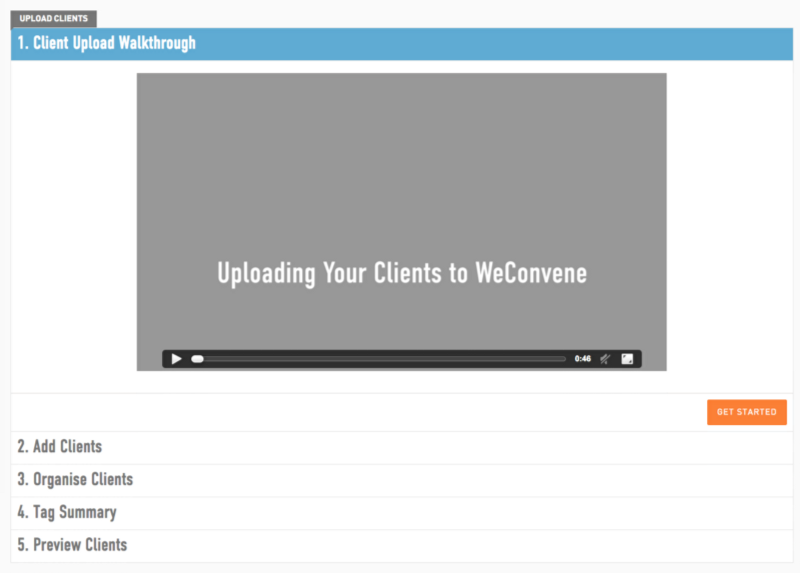
Login as a CAM, click “Client list” on the main navigation, from there, click “Add Clients” at the top right.
Since the upload process might still be a bit complicated to first time users, a walkthrough video is made available for users to get the grip, let’s skip it and click “Get Started” for now as I’ll be walking you through…
Users can either copy the whole CSV file and paste in the text area, or drag and drop the file from outside, let’s do a bit of drag and drop.
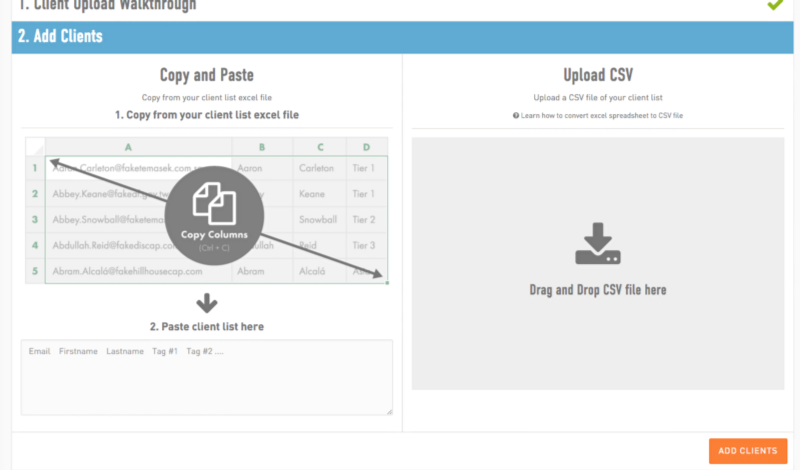
Email addresses are immediately mapped, and we will arrive at the third step.
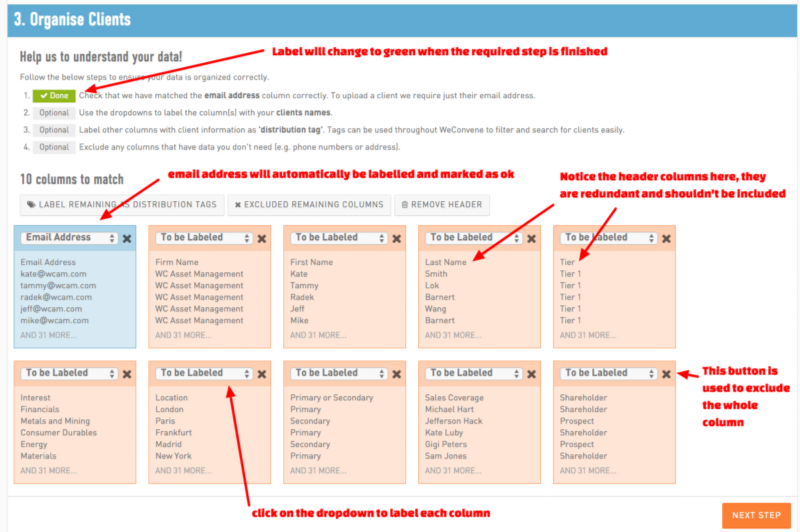
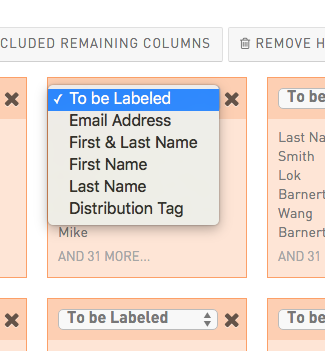
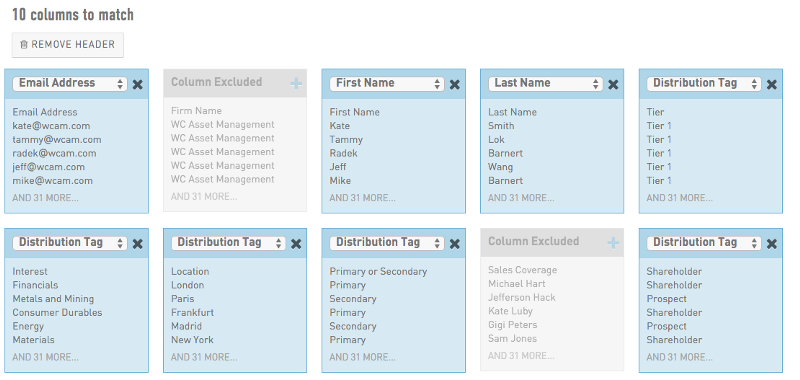
Click on one of the dropdowns to label the column
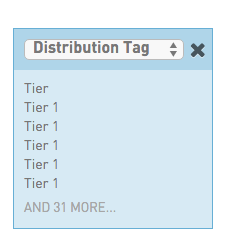
Tier 1! that’s definitely a distribution we want, let’s mark it as is
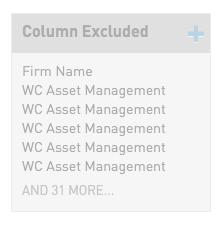
For columns that are useless, click on the cross button to exclude, it will be greyed out, and can still be added back when clicking the plus button

All done! Notice the redundant header rows here, we can hit “remove header” to take them away, but let’s leave it there on purpose and see what happens. Go and hit “Next Step”.
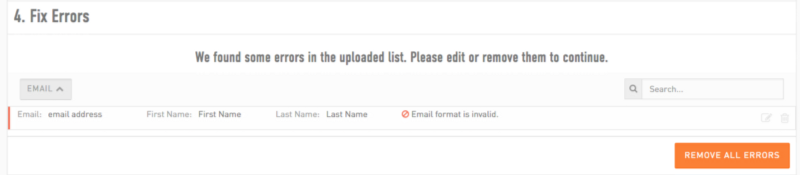
The page will detect erroneous rows and prompt for correction, hit “Remove All Errors” to do so.
A tag summary will be shown next, an extra step to let users verify their input, hit “”

Due to server side limitation, uploaded clients are not editable, so this is a final step if users want to edit their clients. Hit “Upload” if nothing needs to be done.

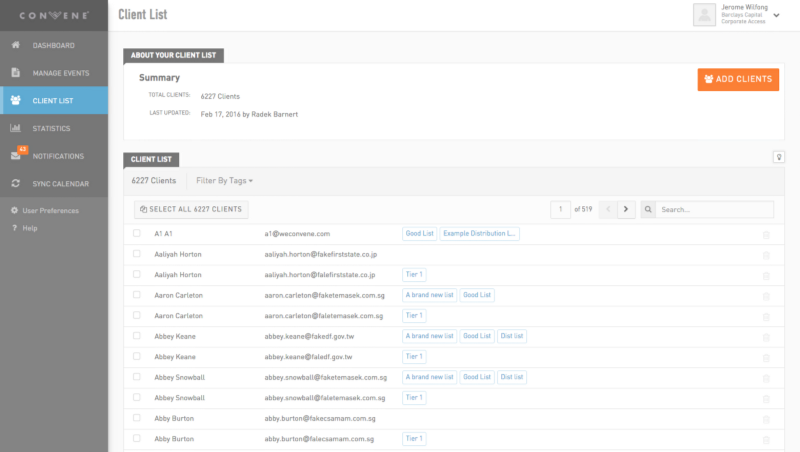
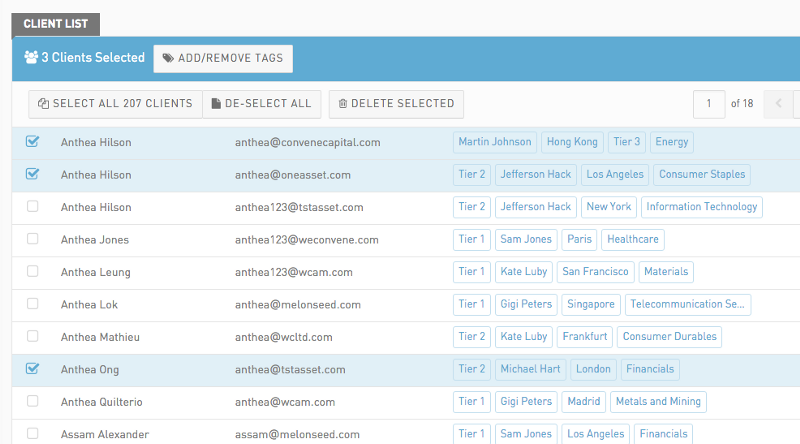
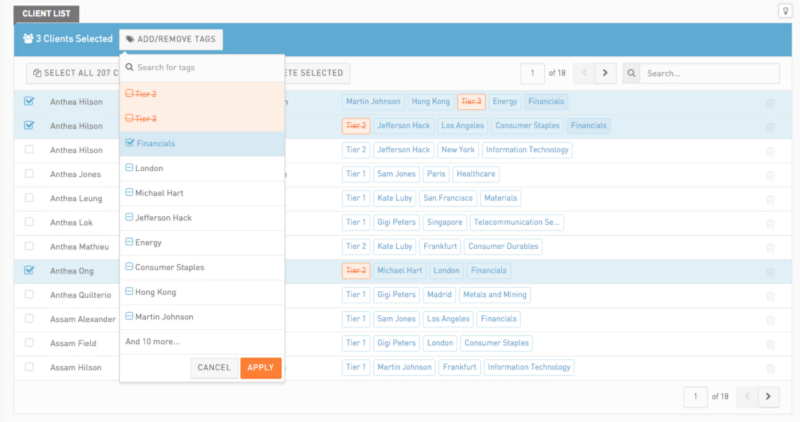
Distribution List Interaction Now users will be redirected to the client list page, where you can see a huge list of uploaded clients. Tags are in blue. Try selecting a few of them.

Click Add/Remove Tag
All your distribution tags will appear here, you can narrow down by searching for specific tags, click on the “minus” sign on the tags to cycle through different actions.
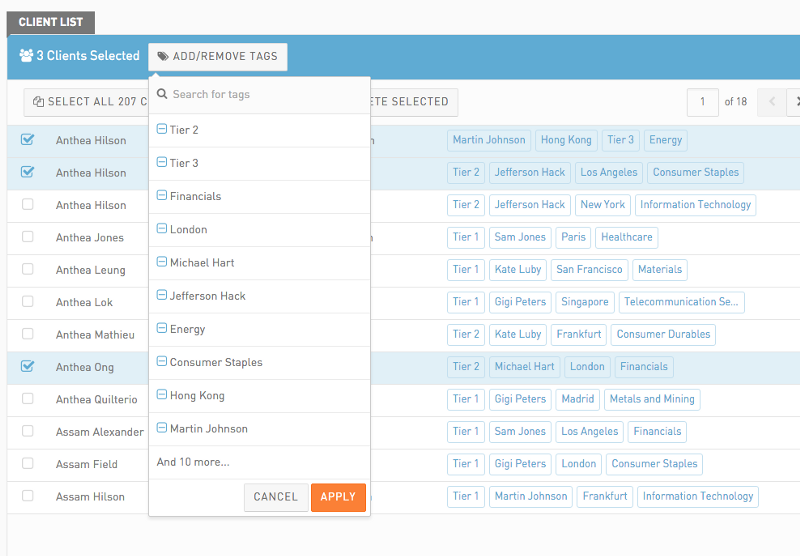
The “minus” sign indicates that the tags are in a neutral state: they are either partially applied to your selection or not applied at all. As you click once, the respective tag will be deleted from your selection; Click again and you will apply the tag to all of your selection; Click once more to cycle back to the “minus” state. The results can be previewed immediately to the list at the back.
If users want to apply a completely new tag to the selection, type it into the search field, a “New” label will appear next to it, click on the checkbox to apply it to selection.
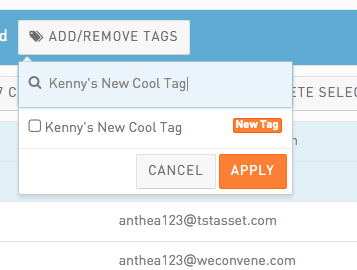
Finished.
